Monday, July 30, 2012

Tracing paper

A quick in between post on tracing/wax/carbon paper. Karin said she found it difficult to find wax paper and asked what I used for it.
I use Burda copying paper and am not aware of any other brand available. I can buy it in a notions store. It’s available in a package with white and yellow and a package with blue and red marking paper. The sheets are large (82x57 cm), not as large as the one Susan Khalje uses in her class probably, but I usually only have to reposition for very long or wide pattern pieces (think trousers, wide skirt panels). A set of paper lasts for a very long time. Last year I bought a new set with the red sheet, the one I used till then had lasted a couple of years. In the end it was torn by folding and using a lot, but I still have that piece too, held together by tape on the back, as it doesn’t give too thick wax dots any more, and in some cases (thinner fabric) I still prefer to use the old sheet!
I use it for “real” fabric as well, not only for muslins, depending on the fabric of course! I wouldn’t use the coloured ones on a white fabric, but have used white on white, and surprisingly usually that is just visible enough.
In English it’s called Carbon paper, and if you google for Burda carbon paper you might find a shop that sells it. This way I found out it’s also sold by several vendors on Ebay. Make sure you buy “Kopierpapier” (I indicated it on the screenshot).
image

Starting the dress

The pattern that came with the course is Vogue 8648. It was possible to use another pattern, but this is quite nice with a lot of lines that make it possible to adjust for fit. I think I’m going to make the short sleeve version, though could decide to make it sleeveless. It will depend on the muslin.

Choosing the size was a nightmare of course: my bust is size 16, but I know I have a narrow back with a full bust. My waist is a size 12-14, and hipsize is a 18-20 (do I want to tell this?). In the end I decided to trace the 16 for the top based on the finished measurements indicated on the pattern. The muslin can be adapted later for the more narrow back I hope. If not a second muslin must be made. I usually trace my patterns, and this one is no exception. It makes it easier too if I have to go back to another size.
The skirt pieces I tapered down to a size 18. There are extra wide seam allowances, so if necessary I have space to play with. The finished measurements do indicate that it should be OK. I’m not completely fitting at the waist, as that will give the hips too much emphasis. For this Burda dress that worked well. The muslin will show whether that will work for this dress as well.

The indications for the finished width on the pattern. It was only after I started blogging that I realized this indication was there on most patterns. I was told by one of my readers after a remark I made. For this pattern the finished measurements for bust, waist and hips are indicated.


There’s someting strange though with the markings on this pattern for center front and back. Normally they are marked at the 5/8 inch line. Seeing the midrif front section I was wondering whether the seam allowances were different there. Susan Khalje hadn’t remarked on this, nor could I find an indication on the pattern or the pattern instructions. As you can see the markings are for 1/4 inch (first picture), half an inch (second picture) and the usual 5/8 inch on the last picture. I checked with the pattern parts that have to be sewn to these parts, and it seems that the markings are just off, the pieces itself seem to be correct. Strange!


Susan works with the actual seam lines (hurray for that, I don’t like to work with the included seamallowances on complicated pattern pieces, as I’ve mentioned before when making a Vogue jacket). This is as far as I managed this weekend. The muslin is cut and marked (with wax paper and by stitchting all the lines). The top of the muslin is constructed. On each part is written what it is. Later this muslin will be the pattern to cut the underlining from. To be continued.

Sunday, July 29, 2012

Couture dress

A few weeks ago I registered for the online course “The Couture Dress” by Susan Khalje.


image

It was highly recommended by me by Joana, one of the ladies from the “Brussels group” last year and with whom I spent the most enjoyable bra sewing Saturday 2 weeks ago.

The course includes Vogue pattern 8648, which makes it extra worthwhile, but even without the pattern the course is worth every cent you pay for it (personal opinion!).

Until yesterday I have only been watching the lessons and didn’t do any work on it myself. I now can not recommend this class enough, it’s the next best thing to having a personal lesson from Susan Khalje. The video’s are clear, Susan is a very experienced teacher (apart from being a master of sewing of course) and explains very clearly what she's doing, how and why. The video's are long, she takes her time, no rushing through steps. Couture isn’t about rushing either!

I haven’t finished watching all the lessons, I have a few more to go. This is not a beginners course and it involves a lot of work to make a dress like this. Susan uses a plaid fabric for construction and gives a lot of tips and tricks for matching the plaids as well, a real bonus. If you’re a more experienced sewer (I think I am) there are some things you know already of course, but a lot of new things as well. The underlining and the process how and why were almost all new to me, I have never done that before.

This is a screenshot from all the lessons included and the length of them.

SNAGHTML23e5f3cc

As it takes all this work, I think I’ll make a black dress, as one “ought” to have a basic black dress in the wardrobe and these are no techniques to make a one-season dress. After all the work you have to put into it, you will want a dress that will last a bit longer than that, at least, that’s how I feel about it. And some of the techniques can be used for other garments too, they don’t apply to a dress only.

I will be posting about my progress, though it won’t be a continuous line of posts as I will take my time with this too and probably will do a few things in between because I want to fit the muslin together with someone else and because I don’t have all that I need yet. I have to buy fabric for it and see whether I have enough silk organza. It will be a great experience to do this.  I’ll tag my posts with “couture dress”.

Stay tuned if you’re interested.

Friday, July 27, 2012

Pattern found

A few posts ago I told you about the missing Sorbetto pattern. Well, I found it not long after I posted (of course). I had come across it while searching for it, there was a pattern with a bit of blue lace attached. “Ah, the lace cardigan” I thought. I had completely forgotten that I made the lace Sorbetto top and that this was actually the pattern for it. Browsing through the pictures on a memory card to see what I could remove I saw the picture of the top and only then the lightbulb flashed on in my head. The pattern was right in front of me.

There’s nothing special to say about this top. It’s my 4th Sorbetto and there are a lot of them in blogosphere and reviewed on PR.

For me it’s a versatile top, it goes with my grey or white jeans, with a pair of black linen trousers or skirt, white cardigan, black jacket etc. It’s a bit loose below the bust point, that’s fine for me, it won’t be clinging to me in the hot weather we have here finally. Time to enjoy a bit of sunshine.

Sunday, July 22, 2012

Cowl neck top

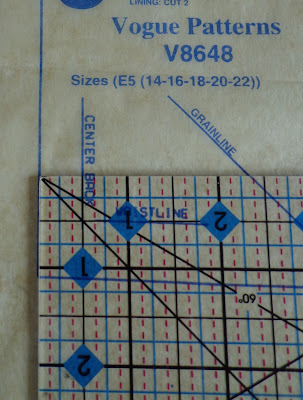
A pattern I’m very, very happy with. I copied this pattern a few weeks ago from my friend Valerie. It’s a pattern from an English (?) magazine from about 10 years ago if I remember it right. Can’t remember the name of the magazine and it’s not that important too, as it’s not available any more. I just traced Valeries pattern.
I prefer this cowl to the one of the Patrones top I made recently because this one is a little higher, which  makes it work-appropriate.
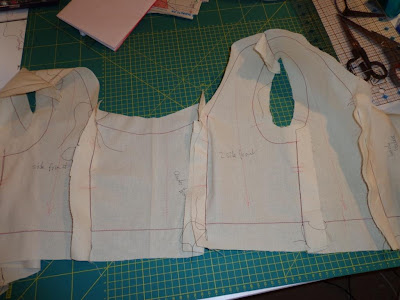
The pattern has a facing that extends to the armhole, so that the whole front armhole needs no separate finishing. I was on my own for the order of construction and the second time I did it a bit different than the first time. As I think I will use this pattern more often I write the steps here for my own reference, but you could use the same technique on another cowl neck pattern with a facing like this or a facing added like this.

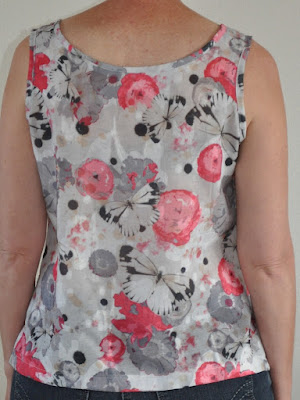
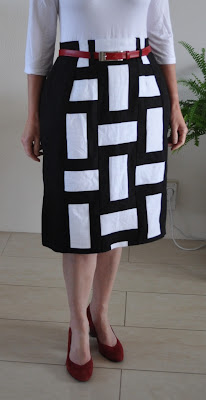
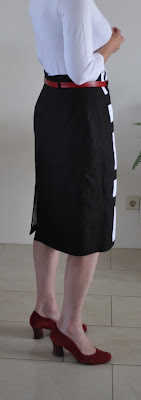
The finished pictures are not so good, the left version was taken from the laundry bin to get a picture (DD did not have the patience to wait for me to iron it), the right one was taken in a mirror.
I should not be cutting late at night. That’s what I did with the fuchsia top: I forgot to add an inch to the bottom and the fabric was cut in the wrong direction. I didn’t see the grainline on this fabric. Artificial light and aging eyes!


Construction:
Finish the armscye and neck of the back. Make sure you don’t add to the width, the finished width should be on the stitching line.
 
I used strips of fabric and topstitched on the edge.

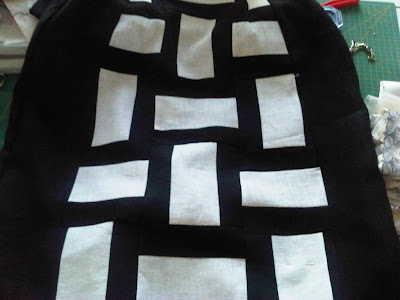
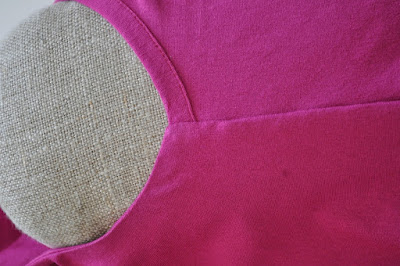
Fold the facing of the cowl neck to the front, wrong right sides together. And in this picture you can see what the facing looks like.
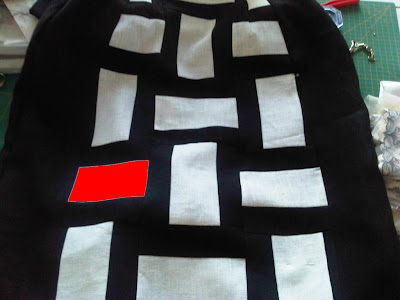
Stitch the seams of the armholes (the yellow line on the left)
 
I’ve added a piece of two-sided fusible material  (like steam a seam, only cut this from a wide piece). Attach this to the facing side!! I did it wrong, this is my referency mainly!) This way you don’t need understitching or topstitching at the front, you could leave this step out). When finished you pull the paper off and press it.
 
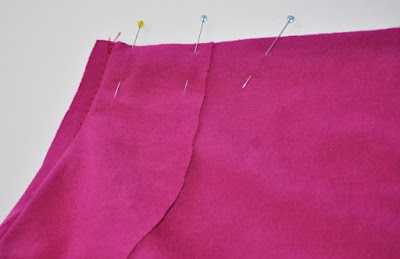
Insert the shoulder of the back part into the front and front facing, right sides together, pin and stitch the seam

At the side,  pin the back to the front, with the facing turned away.
 

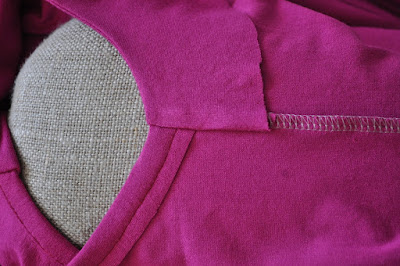
Flip the facing over the side seam
 
I’ve stitched a few stitches with my regular sewing maching to secure the layers. Then I serged the side seam.

Clip the corners from the back at shoulders and side seam. Trim the seams.
  

Turn the top, the only thing left to do is hem it. 
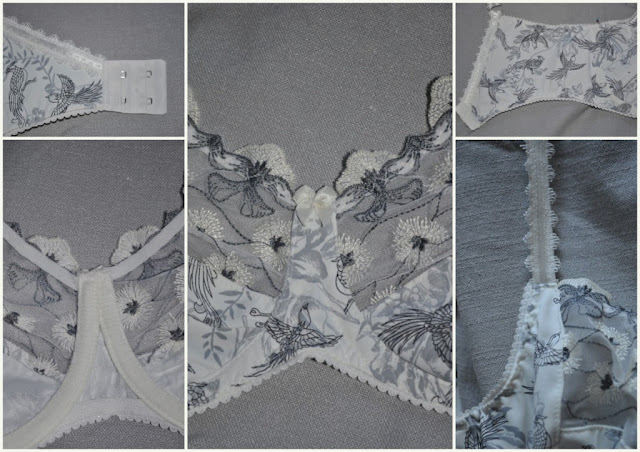
Inside of sideseam:
 
Outside of side seam
 
Inside of shoulder seam.
 
Outside of shoulder seam.
 

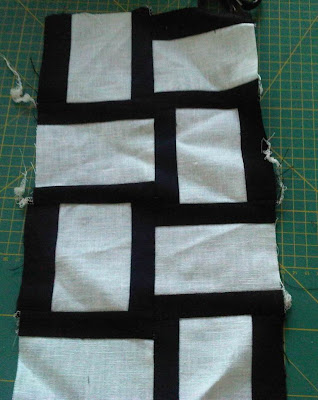
That’s 3 posts in 3 days, long time ago I did that I think. I’m off to think of what to sew next. Not the Burda top yet, though to answer Caroly’n’s question: yes, the picture with the flowered skirt is the version I’ll be making, at least a skirt with a print or structure. A skirt with flowers is not (yet) what I see as “me”.

Saturday, July 21, 2012

Wow, Burda August

DSC_0120

Fall is here is the main title on the cover! It’s fall here for months already, summer never really arrived, rain and grey, cold days is all we had. But that’s beyond the point.

If you’ve been reading my blog for some time you know I have been very disappointed in BurdaStyle in the past two years, I stopped moaning about the magazine, but mostly also stopped buying it with one or two exception because I liked 1 pattern in the magazine. This morning in the supermarket I saw the new August Burda and it was for the first time in years that the cover spoke “buy me”.

I made sure the top was in the issue as a pattern (having bought magazines in the past based on the cover picture only to find out later that the item that piqued my interest was a rtw item).

This is an issue to like (of course, personal opinion). Fitted and/or shaped garments are back! I love quite a few patterns. The peplum top is certainly on the to do list now. Line drawings of a few favorites (there are more to like


Screenshots copyright by BurdaStyle.

imageimage

imageimage

The peplum top in black on a printed skirt.


peplum top


I hope this is the new direction BurdaStyle magazine takes. What a great issue.

Friday, July 20, 2012

Skirt - finished pictures

Took some time but here are the pictures of the finished black and white skirt. I used a Vogue pattern (8781)for the pencil skirt. It has a high waist, any pattern like this would be suitable for the skirt I made, and it would be good in a pencil skirt with waistband too.
image

The technique for the blocks of fabric was published in this video by Trudy from HotPatterns. As I mentioned in my earlier post on this skirt, I was on my own (with help from Valerie and Sheila) deciding the measurements of the strips of white and black fabric to use, as I didn’t use her pattern. The blocks are larger in the end than the one Trudy shows, but that’s not important, I like the skirt. Deceptively skinny (the name of the Hot Patterns pattern)? Well, I’m not the one to judge. A lifelong awareness of 2-3 sizes difference between hip and waist measurement makes that you only see the wide part Knipogende emoticon.
As to the red block I digitally entered in the previous post, it was too late to add such a block, I should have done that earlier. Perhaps someone else will take up on the idea?
To me this was venturing out of my comfort zone and I liked it. Should definitely do it more often, more plans in my head than time available, but one of the plans for the next few months is to draft myself a pattern based on the book “Patternmaking for fashion design” by Helen Joseph Armstrong that I recently bought. Not short term though. It’s a wonderful book which inspires me to venture into pattern drafting again.


Tuesday, July 10, 2012

Burda archive

I missed the Burda archives since they changed the sites to Burdastyle.
Accidentally I found the archives still exist on the French site and contain the archives from mid 2007 till today! Here's the link.
For as long as it's valid.

Sunday, July 8, 2012

Does this happen to you?


The title is referring to not being able to find a pattern. I bought a little piece of fabric I want to make the sorbetto top of. I’ve made the pattern twice before, have tweaked the fit to my liking and now I can NOT find the pattern, nowhere. Seems to have disappeared. Has this happened to you? Frustrating. I know I made a size 10, but have to reprint and tape the sheets together again, which I don’t like. Worst is that I did some change to get rid of armhole gaping. Well, I thought I would whip it up tonight, but will not happen.

I got quite a bit done this week, the skirt has only some handstitching left (why does it always takes longer when I reach that point to finish a garment?). Pictures on me to follow later this week. Without red block, it was too late to get that into the pattern. I would have had to make it all over again. I like it enough just in the black and white.

And yesterday I made a cowl neck top that I’m actually wearing today already. I’ll show you that one also in another post. For now I leave you with an impression of pictures from the latest bra. Working together with Pauline 2 weeks ago got me all inspired again. I simply LOVE this fabric/lace combination.


Sunday, July 1, 2012

Inspired by Valerie

When I was with my sewing friend Valerie two weeks ago (that long already?) she asked whether I had seen the video in which Trudy from Hotpatterns showed a black and white skirt. Valerie thought it was something I would like. I hadn’t seen the video, and she was right: when I had seen it I immediately knew that I wanted to make the skirt. Indeed I even bought some black linen a day later (having white already).

To be very honest I didn’t buy the pattern. It’s the Deco Vibe Deceptively Skinny Patchwork Skirt, the link to the video is from that page as well. Trudy shows how to make the front panel, and it being a pencil skirt, I took the pattern that I used for the Dries van Nooten knock off earlier this year: a high waist pencil skirt.


I started with drawing the idea on a piece of paper before cutting into fabric.


Then I made a first sample. Not having the pattern I was of course on my own to decide on measurements. The first one was a bit too narrow in the black we thought. So I made another sample, which I couldn’t find now to take a picture. Cell phone pictures btw, my good camera is on holiday ;)


The result for this moment, the skirt is basicly constructed and it fits. After comparison now, the first sample is more like the HotPatterns one after all and my side panels are wider. But… I like it so far.

There were ideas about having 1 red block into the front or making a lace insert. With Pauline I discussed the possibility of adding separating zippers on the front so that you could have different front panels and extend the wearing possibilities. I did not do this after all, because of the high costs of those zippers and I was afraid of it becoming too stiff in the waist. Nice idea to think about though.

After some editing: the idea of the red block: